 Important:
Step 1: Build and Check your figure
Before adding your figure to a library, be sure that you have read the previous sections and understand the reasons why it is important to use the appropriate layers and follow the guidelines to ensure you get the desired results. The size of your figure is important as well because it will come out of the library at the same size that it was drafted. Make sure all the layers that make up your figure are turned on and visible.
Important:
If you use any DynaScape figures, hatches or sections in your new figure, you must ‘Explode’ them before inserting them into a library. If you neglect to do so your figure will not save correctly, and you may have additional ‘unknown’ figures added to your library.
Step 2: Activate the Library for Adding your New Figure
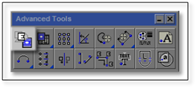
1. To add your figure to a library, you must first activate the library into which you wish to add the figure: To create a new library, open the Advanced Tools toolbox by clicking on the Adv button in the top toggle bar. Click on the first tool: Define a new library figure.
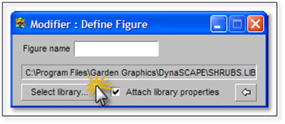
a. A modifier panel will appear.
2. To activate the library, click on the Select library... button on the modifier panel:
a. A new panel appears showing all the existing libraries in DynaScape Design that are stored in the C:\Documents and Settings\(User Name)\My Documents\DynaSCAPEDS\symbols folder. If this folder does not appear, navigate to this location and a list of the existing Figure Libraries in DynaScape will appear.
3. Select the Library you wish to add your new figure to by clicking on the library name and click on the Open button. This will activate the selected library. Keep the modifier panel open for the next step.
Step 3: Add Your New Figure to the Active Library
The next steps will take you through the process of adding your figure to the active library. Once this figure is in the figure library you will have quick access to it and be able to insert it into any drawing (new or old).
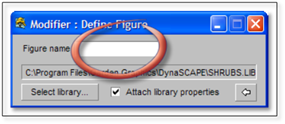
1. Choose a name for the new figure and type it into the space beside Figure Name. The figure name chosen cannot duplicate a figure name already in use. If you wish, you may examine the figure names now in use in the shrubs library in the figures folder.
a. Since using [spacebar] in DynaScape Design is the same as [Enter], you must use [-] or [_] between words in the name in place of a space. Use [spacebar] or [Enter] at the end of the name to begin the next step.
 Tip:
Tip:
During the process of adding your figure to a library, you can follow the commands for the next step by reading the Prompt Line.
2. Click on all the items that represent your new figure.
3. Once you have selected all the items for your figure, right-click to end the selection process.
4. Now you need to choose an insertion point. The insertion point is the location within the figure to which it will be attached to your crosshairs when inserting the figure into a drawing.
a. It is recommended to put this as close to the center of your figure as possible for a number of reasons, mainly for accuracy. Click on the location you wish to use as the insertion point.
5. Right-click to end the process. The CLI will tell you that your figure has been added to a library. The process is now complete.
Step 4: Activating the New Figure Library
If you have created a new library for your figure, you must activate the library so it will show up in the list of libraries. To activate your library, follow the steps outlined later in this chapter called: How to Active a New Figure Library
If you have added the figure to a library that is already active, skip to Step 5:
Step 5: Testing your New Figure
It is important to test a new figure to be sure it was drawn correctly and works the same as all DynaScape Design figures. To do this, first find the new figure in the libraries found in the Figures tab in the Sidebar Folder. You will always find it at the bottom of the list. If it does not appear, you may need to click on another library first and go back to the correct library to refresh it.
1. Click on your new figure in the list of library thumbnails.
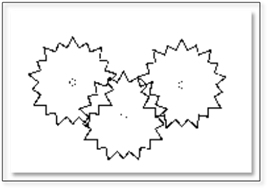
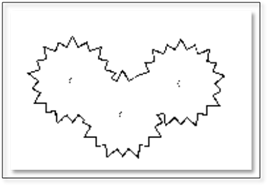
2. Insert the new figure into the drawing. Notice how the figure rotation point is the figure’s insertion point that was selected when the figure was saved. Insert three or four figures and slightly overlap them for clustering. The results should look like this:
3. Follow the steps mentioned previous on how to Cluster library figures.
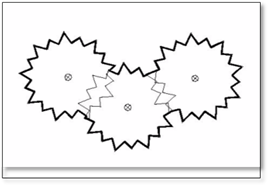
4. When the clustering process is completed press [Enter] or [ESC] to end the command. The results should look like this:
5. Turn All Layers On and you should be able to see that there is a Color_Setup boundary (if this boundary was added) where the sections of the cluster layer have been trimmed away.
6. Save the drawing and open it in DynaScape Color to see if the figure colors correctly. If a Color_Setup boundary was included in the figure, they should color as individual swatches within the grouping (as opposed to one swatch filling the entire grouping).