 Important: Before You Use the Cluster
Tool
Important: Before You Use the Cluster
Tool
Important: Before You Use the Cluster
Tool
In order for the process of clustering figures to have the desired results, a few important rules must be observed:
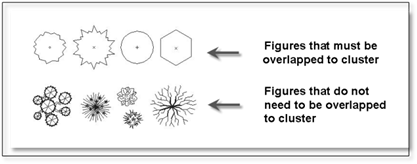
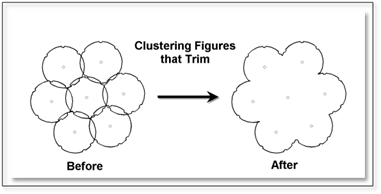
1. Figures that have a continuous, closed outer perimeter must overlap each other in order to be trimmed out correctly. If the figures do not overlap, the figure’s entire perimeter may be removed.
2. If you need to cluster figures that are not overlapping, you must make sure that the Erase all inner segments option in the cluster modifier panel is not selected.
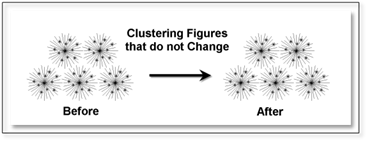
All other figures that do not have a continuous, closed outer perimeter do not require any special rules to be considered because they do not change in appearance during the clustering process.
Steps to Clustering Figures
Once you have inserted your figures into your drawing and considered the rules mentioned previous, follow these steps. It is very helpful to select the appropriate Mode for the type of figures you wish to cluster. This will temporarily turn off all other layers with figures that may accidentally be selected during the clustering process:
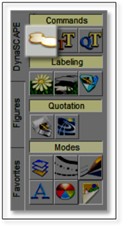
1. Select the Cluster figures tool under the Commands list in the DynaScape sidebar folder. By right-clicking on the icon you will open the cluster modifier panel.
2. If you are clustering figures that are all overlapping correctly and wish to have the overlapping segments trimmed out, select the Erase all inner segments option in the cluster modifier panel (it is defaulted on).
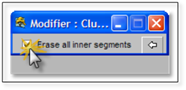
3. If your figures are not overlapping and you wish to cluster them, you must turn the Erase all inner segments option off.
4. Click on all the figures you wish to blend into a group. You can use the various methods to select multiple figures at once described in the chapter titled Selecting and Filtering Entities. Only select figures that are overlapping each other.
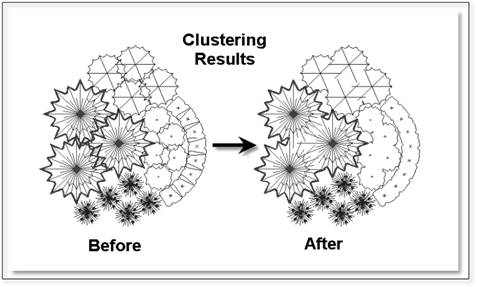
5. Once you have selected all the figures to be clustered, right-click to complete the process. The figures that can be trimmed will change. It may take a few moments if you have selected a large number of figures to cluster.
 Tip:
Tip:
Clustering large groups of figures may take a long time. To speed up the process, cluster small groups of ten to twenty figures first. Then cluster the groups together, two or three groups at a time. If you find the clustering process is progressing too slowly, you can right-click to stop and undo the action, to begin again, taking smaller groups at a time.
Why Do Some Figures Appear to Change While Others Don’t?
While all figures will cluster, only figures found in the tree, shrub and rock libraries will appear to change during the clustering process. Of those figures, only those with a continuous, closed outer perimeter will change by having their overlapping segments trimmed away and removed.
All other figures, regardless of which libraries they are taken from, will not change in appearance. They will still become a single entity or block when clustered.
Why Figures Disappear After Clustering
1. Figures will disappear after clustering if the figures that were clustered did not overlap each other. If your figures are not overlapping and you wish to cluster them, you must turn the Erase all inner segments option off.
2. Figures were skewed during or after their insertion. Do not use the outer grips on a figure to resize them. This will skew the figure and cause them to lose their ring during clustering.