
In order for Design to import a plant list into the Plant List Editor, the file must be set up correctly. Design can only import a ‘.csv’ type of file (Comma Separated Value) or a comma delimited ‘.txt’ file. A ‘.csv’ file can be created using Microsoft Excel and can be modified using Microsoft Excel and Notepad.
The following plant Information is the only information that can be imported:
•Botanical Name*
•Common Name*
•Size
•Price
•SKU #
* Required
Follow these steps to prepare the file for import:
1. Open the file in Excel.
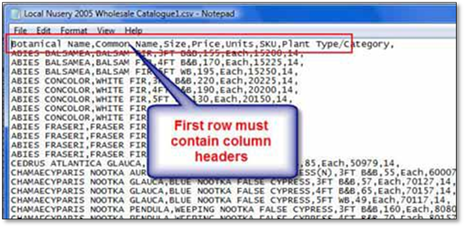
2. If column headers already exist, make sure they match the following exactly. Any columns not matching these names will be ignored:
Botanical Name, Common Name, Size, Price, SKU
The column headers must match the requirements and be spelled correctly.
Only columns with headers will be imported. The order of the column does not matter e.g., the first column can be SKU.
 Note:
Note:
If using a Text file instead of an Excel file, the file must have column headers and each column must be separated by a comma. Each plant must be on its own row.
3. If column headers do not already exist, add a new row with the header names mentioned above. This row must be the first row.
4. If the file contains multiple worksheets, you must copy all the data to one worksheet. Only data on the tab that was visible at the time it was saved will be imported.
5. Remove any blank or incomplete rows.
6. Remove any plants or plants with sizes that you do not wish to import. The more plants you import, the more you will need to manage.
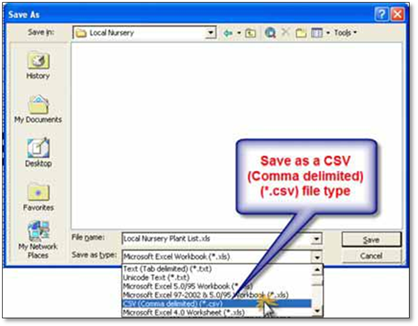
7. Save the file as a CSV (Comma delimited)(*.csv) type. This is the file you will import into the Plant List Editor
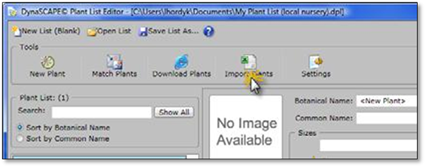
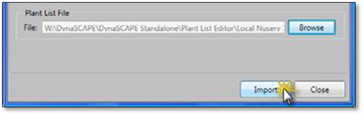
8. To import the .csv file open the Plant Label Panel and the Plant List Editor (Edit My Plant List).
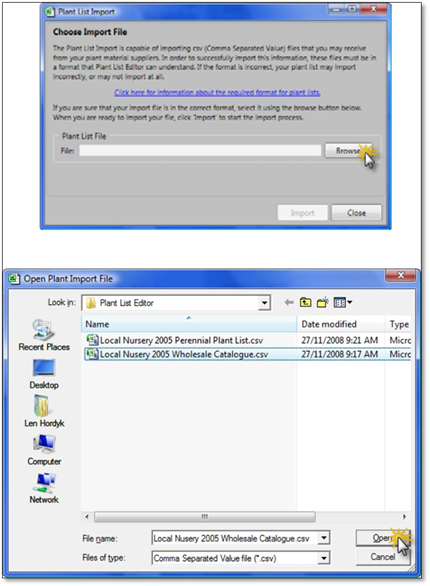
9. Click on Import Plants to open the Plant Import Wizard.
10. Click Browse to find the .csv file to import. Locate the file and click Open.
11. Click on the Import button.
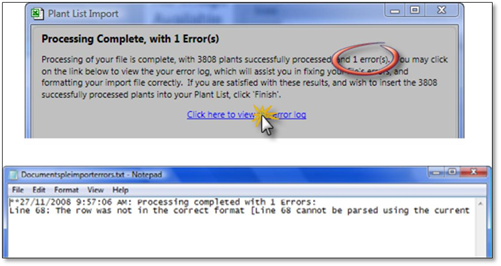
12. The process will complete awaiting your confirmation. If there were any errors, click on the link to view the Error Log. The error log will explain the errors and the line in which the error occurred so you can go back to the file to fix it. If no errors occurred, click Finish. Once the import is complete the wizard will close, and the imported plants will appear in the Plant List Editor.
13. All imported plants need to be matched to the Online Plant Database. You match them one at a time or use the Batch Matching and Update Wizard.