Often you will come across a situation where the area to be filled with a pattern is somewhat complex. With the pattern tools it is possible to fill around an area, so that the pattern does not fill in a particular area (i.e., for a pool the pattern is applied so only the coping area is filled) or fills in around items (i.e., around furniture placed on a patio).
Option # 1:
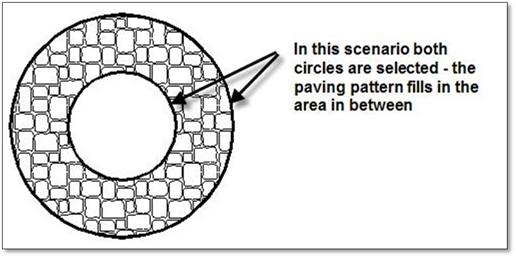
1. Draw a closed polyline, circle or rectangle around the area that is not to be filled.
2. When selecting the bounding entities for the pattern, the outside line along with the line surround the area not to be filled are both selected. The pattern selected will fill in the area between these two lines.
Option # 2:
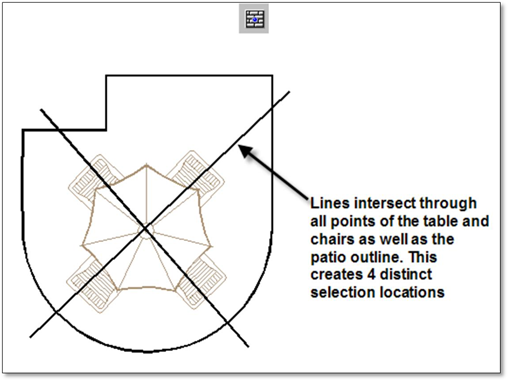
When inserting a pattern around furniture on a patio, follow these steps:
1. If you attempt to insert a pattern around a library figure such as a table and chairs, the pattern tool cannot find it and will hatch through it. This is because the object is still a figure. Explode the figure to break it down into individual arcs, lines and polylines, using the explode tool.

2. Then draw lines through the area boundary as well as through the furniture to create a number of closed areas. The idea here is to connect any objects ‘floating’ inside the area to the outside boundary.
3. Using the Insert a Hatch/Generic Pattern into a contained area tool, click inside each of the closed areas and DynaScape will find both the edges of the patio and the edges of the furniture. The edges of each area will light up blue. Right‐click after each area is found to insert the pattern.