Plant schedules contain hidden text nodes under the remark’s header. These nodes will assist you in entering any addition information under the “Remarks” header of your schedule. The nodes have already been preset to match the attributes of the existing text within the schedule.
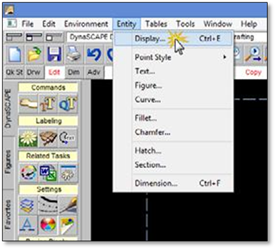
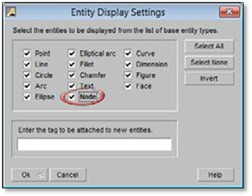
1. To use the nodes, you first need to make them visible. To make the nodes visible, left click on the Entity pull down menu and select Display. The Entity Display Settings window will appear.
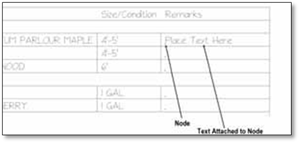
Select the Node option to make it active and click OK. Your plant schedule should now have nodes visible along the left-hand side of the Remarks column.
2. Now that your nodes are visible, in the Draw toolbox you will have to access the nested tools under the Insert Text at a Location tool.
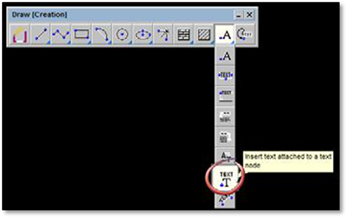
3. Right click on the Insert text attached to a text node tool (shown above) By right clicking on the tool a modifier window will appear. To enter the text, you wish to attach to the first node, left click into the white space and begin typing. Once this is complete left click the Apply button and then select node in the plant schedule you wish to attach text to by left clicking on it once.
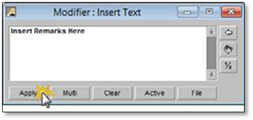
You will notice that the text has automatically been attached to the node.
4. Repeat the above steps until all required nodes are completed.
 Did you
know?
Did you
know?
If you wish to customize the schedule with heavier line weights or if you want to edit any text information after the schedule has been placed on the drawing, you will first have to ‘explode’ the schedule using the Explode tool found in the edit toolbox. This will break the schedule (block) into its original components which can now be revised and edited.
 Tip:
Tip:
If you find that some plants are spelled incorrectly it is better to make the correction within the Plant List Editor rather than editing the schedule. This will eliminate the need to correct the error each time you use that plant.