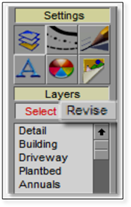
In the DynaScape Sidebar Folder, under Settings heading, each of the Layers, Styles, Weights and Colors tables contains a corresponding Revise table, which is accessed by clicking the Revise toggle.
The Revise table allows you to change the appearance of entities on the drawing. For example, if a line was drawn in the Plantbed layer, rather than in the Driveway layer, the line can be changed. To do so, go to the Layers List and click the Revise button: the background of the Layers List will turn yellow. Next, select the layer to which you want to revise the line: it will flash blue quickly but will not remain highlighted. Next, Click on the line(s) to be revised, then right-click to complete selection and to finish the revise command. The line previously in the Plantbed layer will now take on the attributes (color, weight and style) of the Driveway layer.
 Tip:
Tip:
With this method, multiple lines can be selected for revision at one time but only one setting can be changed at a time.
Alternatively, individual attributes of the layer can be revised in this way, for example, the Weight of the line can be increased or decreased.
The Color can also be changed, which is especially useful when using the “Print using entity display colors” output option (File | Print | On the Print Drawing panel select the Color tab).
The Style of the line can also be changed from Continuous to Stitched to Gray-scale, etc. As mentioned above, each of these options has its own table, accessible by selecting the icon for the attribute, then clicking the Revise toggle. Select the new setting (for example, a new color, line style, etc.), Click to select the entity (or entities) to revise, then right-click to end selection and finish the revise command.