
To import an AutoCAD® drawing into DynaScape Design follow these steps:
1. In DynaScape Design, starting with a new blank prototype, click on the File menu and select one of the two available options:
Import an AutoCAD® DWG/DXF as a new drawing - this option is recommended; it will import into a new DynaScape prototype (it will open a new copy of the same prototype that you last opened).
Import an AutoCAD® DWG/DXF into the current drawing - this option will import into the currently open DynaScape drawing. Use this option if you wish to first choose the prototype the geometry imports into. It is not recommended to use this option to import into a drawing that already has existing geometry.
2. Select the .DWG or .DXF file you wish to import. DynaScape can import AutoCAD® .DWG or DXF files saved to AutoCAD® versions 12 up to 27 (up to AutoCAD® 2018). Click Open.
 Important:
DynaScape can only import AutoCAD® geometry that is on the Model Space page of the actual .DWG or .DXF file being imported. DynaScape cannot import external references (Xref’s) either.
3. The import process is usually quick. In some cases, you may not see the imported geometry. DynaScape will import only geometry drawn in AutoCAD’s Model Space view and because AutoCAD® does not use drawing limits, the geometry may be outside the DynaScape drawing limits and out of your current view. It also may be spread out over a large area of the drawing page. DynaScape will attempt to view all the geometry by viewing the ‘database extents’. The next steps explain how to view and find all the imported geometry and layers.
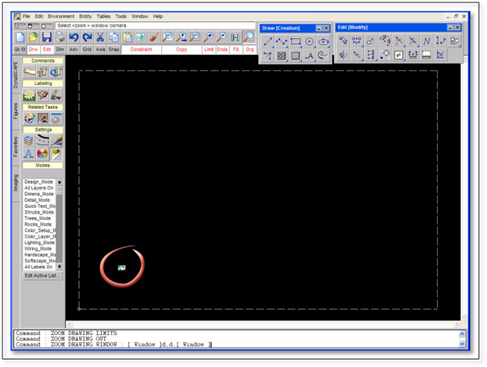
4. Zoom in on the part of the drawing that looks like what you need.
